


Are you looking for any online jobs? or want to Make Money Online? Cheer up !! You are at right place.
Writing blogs is a smart way if you want to make money from home or if you want to start a business without money. So do you wanna know how to create blog? Two important questions come to mind before how to create blog, are “how can we earn from a blog and how much we can earn from a blog” and answers are there are lots of ways of earnings from a blog or website like:
- Earn by ad websites like Google Adsense, Media.net etc.
- Earning from Affiliate marketing like Amazon, Shopify etc.
- You can sell your own services through your website or blog.
- Review Products as an Affiliate, and much more we will discuss later.
You can make huge money from an average blog, you even can’t imagine how much!!
Wanna know Best bloggers and their per month income.

Shocked !! Yes it’s true Blogging has a huge potential, to make money from home and it’s very easy and the best way to among online jobs. If you are interested in writing blogs and want to create a website by yourself we have lots of stuff here for you Lets start now and make a blog by own.
Do you want to learn how to create blog and start earning:
So here we are to make you learn and understand –how to create blog step by step tutorial. Later on, we also learn about How to be a successful blogger too. You will learn one more thing that you can start a business without money.
Let’s start

Follow the steps to know how to create blog
STEP 1 – Choosing a NICHE:
Let’s start our first step in the world of blogging and websites,
Wait-Wait-Wait ….first ask your self two questions why are you starting a blog or a website and why people would be interested in your publication or product or services.
A very first thing you need most is your interest and the 2nd one is your knowledge so always choose such niche which is of your interest and you have a decent knowledge about that niche. Now the 3rd most important thing is to understand your audience’s need and interest. You need to write such highly rich informative content that your readers love the most. Last but not least niche should be productive and should have a pretty volume of readers to attract. To know more about most productive and trending niches.
STEP 2 – Domain Registration:
After choosing your favorite niche, go for domain registration. For best domain selection I prefer to you have at least one day to choose a name for your dream blog or website. Remember always you can’t change your domain name if you choose once so be careful choose a name you like the most and try to keep it related to your niche.
STEP 3 – Purchase Hosting:
In easy words domain name is a name of the business and hosting is the space required to run the business so just like other businesses purchase hosting as per your requirements and initially go with shared hosting plans. There are tons of Hosting provider available on the market. The wrong hosting provider can cause many problems with your blog so choose wisely.
STEP 4 – Link domain to Hosting:
In this step, You need to link your web hosting to your domain. To do this,
- Go to your hosting provider website > Login to Client Area > Server information: here you will find 2 Nameservers copy them one by one and paste them one by one to below-given domain Area
- Go to your Domain name provider > Login to My Domain > Domain settings > Manage DNS > Paste Nameservers one by one here in Custome Nameservers tab and save it.
Congo!! you are done now. Now make our website live.
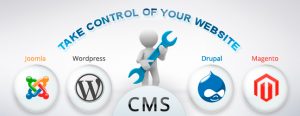
STEP 5 – Choose CMS and Install it:
Another technique to control the look and design of a site is to use a content management system i.e. CMS. There are many dynamic languages people use such as PHP, ASP, and ColdFusion. However, most people do not need an expensive content management system. Before you invest heavily in a content management system or design, you should know what the goals of the website are. To know Most popular Content management systems Almost every website is hosted with Weblog programs such as WordPress, Blogger etc. You can choose easy 1-click install process to start your own self-hosted website.You just need to Login in hosting Client Area > Login to C-pannel > choose CMS available and install it.
STEP 6 – Log In to CMS and Install theme:
You can access to your Blog or website by log into your Sites admin panel here is an example of a CMS – WordPress hosted sites admin login URL, it will be like this www.example.com/wp-admin here you will place your website’s name in place of example in the address bar of your browser and log in using your WordPress username and password which you have provided at the of CMS installation.The WordPress platform consists of two areas: your blog’s front end and back end. The front end is what your visitors will see when they come to your blogs such as theme customizations, plugin functionality enhancements, and content publication. Whereas the back end, known as the WordPress dashboard, allows you to fully manage your blog’s content, community, functionality, and design. It is accessible only by users who you designate and by admin that is you.
There are many themes in the market, it totally depends upon you which theme attracts you most. If you want free theme then you can under appearance section in your admin panel, there you will find lots of themes just click and install which you like the most.
STEP 7 – Install Plugins:
Plugins are important to manage your website more easily. Basic plugins which are required to manage your website in a proper manner and their functionality we will read in next post.
STEP 8 – Create Blog Pages and Categories:
Pages tell information to the readers what is your website all about. Standard pages that you should include: Homepage, Blog, About, Contact Us, Terms, Privacy Policy, and Disclaimers. For creating Pages follow
Dashboard > Pages > Add new
- All Pages: A list of all pages in the dashboard. You can use the listing to quickly edit single or multiple pages’ status, author, parent, template, and ability to comment.
- Add New: Add new pages to your blog.
The main part of the page is creating a Static Home page and Blog page to understand more about it
Read: How to make static home page and blog page
Categories is a kind of folder where you can manage your files in a folder. This is helpful for readers to go to that category which they are seeking for when you post any Article you should choose a relevant category for that article so that Readers can find it easily.For creating Categories follow
Dashboard > Post > Categories > Add new
STEP 9 – Create Blog Menu:
Menus are Generally placed at 3 places and each one is of your choice and Theme requirement. These 3 types of menu are
- Top Header Menu: It comes at the topmost position of your website. (Not compulsory)
- Main Header Menu: It comes at a top position of your website depends upon theme display properties.(Not compulsory)
- Footer Menu: It comes at the Lower side of your website and it mostly contains Standard pages that you should include: About, Contact Us, Terms, Privacy Policy, and Disclaimers, and a custom link to the Sitemap.
For creating Menus follow
Appearance > Menus > Add menu
STEP 10 – Design Logo:
The logo reflects your company or brand image. The more attractive your logo is, more readers will going to love it. You can design your logo by your self with help of few websites. Which offer Free logo design or you too can opt for any paid service too. If you want to create a free logo
Go here: websites to create the best one for you.
STEP 11 – Post Articles:
Now we are done with our blog set up, our next goal is to create content. The content of our blog Should be Unique, Informative, Relevant to the topic and Minimum of 500 words. Without great content, even the most well-designed, tightly-structured blogs will ultimately fail. Try to write SEO friendly content for your blog to know more on Writing blogs click here and read this one to know how to become a successful blogger.
STEP 12 – Index in Search Engines:
Completing all above steps you need to submit your website and its data to Google or other search engines. After this, they will store your website data on their server and they start sending traffic to your website if anyone searches for that term that is available on your website. For index in Google click here and to index in Bing click here.
STEP 13 – Place Adsense ads:
Now our Website or Blog is Ready for Monetizing and now we need to place Adsense ads but before applying for Adsense ads application we need to be very careful else you may face rejections so what mistakes you shouldn’t do and what you should do you can read here and after reading that login to Google Adsense and create your Adsense account.
STEP 14 – Optimize your website for ON page SEO:
We have done with our blog or website set-up. Placed Adsense ads too for monetizing but that’s not all enough. We also need decent traffic to our website or blog and from where it will come ?? It will come from search engines, where our valuable readers will search for the content which is on our blog. As these days there are lots of searches available for few keywords so “They” can’t find us so easily. So we need to optimize our blog for those particular keywords. So they can find the most relevant search for their keywords thus they can reach us easily. As gradually we can increase our traffic as well as our earnings.
Read more: On Page SEO.
STEP 15 – Optimize your website for OFF page SEO:
We have learned about ON page SEO earlier, now it’s time to know what is OFF page SEO then. A well known few Terms related to OFF page SEO are
- Backlinking
- Blog Commenting
- Social Bookmarking and much more
That’s all now we know how to create blog.
Feel free to ask if any doubt is still wandering in your mind in facebook messenger.
” I have tried my best to cover all in a nutshell but if still, something left message me on Facebook. Please like and subscribe for many useful updates” on some important topics like:
- Download The Best 3DS Emulator: Nintendo 3ds Emulator With 10 Best Option
- Watch Game of Thrones Online Free: Where You Can Watch Game of Thrones Streaming Free.
- Game Of Thrones Theme Wallpapers: The Game wallpaper.
- The Tesla Car Models: Tesla Roadster, Tesla Model X, Tesla Model 3, and Tesla Model S Price & Specifications.
- How To Do Free Credit Score Check Online?
- How to Check CIBIL Score? : Check CIBIL Score Online in Just 1 min.
